In march 2015, I wrote about using Pygments when including source code in papers (and on the web). I still use Pygments, but I have never updated the description on how I do it now. In most cases, I use Pygments implicit without interacting with the program myself. I leave it to the LaTeX package minted. You still need to install Pygments, but you do not need to interact with it. The minted package calls Pygments to do the task for you. The only thing you have to do is to ensure that LaTeX or PDFLaTeX (or whatever version of LaTeX you are using) is passed the --shell-escape option. Otherwise, LaTeX is not allowed to do such calls.
I often use minted in combination with the LaTeX package fancyvrb. For example in this excerption from a LaTeX document:
  \usepackage{fancyvrb}
  \usepackage{minted}

  ⁝

  The function \mintinline{python}{dblderivative} should be used
  like this:

    \inputminted[firstline=2]{python}{dblderivative-ex.py}

  The execution of this example will give the following output:

    \VerbatimInput[label=Resultat fra kjøring]{dblderivative-ex.out}
In the preamble I load the two LaTeX packages. The \inputminted command will include the Python code from the file dblderivative.py pretty-printed in the document in the selected style. You can use the command \usemintedstyle to change the style of the code included in the document. To list possible styles run the following command in a shell:
pygmentize -L styles
The default style is inspired by Emacs. The \VerbatimInput command in the example will include the text file dblderivative-ex.out with a nice layout in the document, including a descriptive text (label). In this example the text file is generated from running the Python program dblderivative-ex.py piping the output from the program to the text file:
python dblderivative-ex.py > dblderivative-ex.out
This example above can typically end up looking like this in the final PDF-document:
You can also include code directly in LaTeX using the minted environment:
I have Python 3.7 on my Mac (currently, I am not able to get Qt and Python 3.8 to work). I have also installed numpy and matplotlib with pip (since I have many different Python installations on my Mac, including 2.7, 3.7 and 3.8, I will use pip3.7 to be sure the right Python installation is used):
  > cd path/to/my/git/clone/of/qt
  > git clone git://code.qt.io/qt/qt5.git
  > cd gt5
  > git checkout 5.12
  > perl init-repository
  > cd ..
  > mkdir qt5-build
  > cd qt5-build
  > ../qt5/configure -developer-build -opensource \
      -nomake examples -nomake tests
  > make -j4
In the configure step above you have to accept the license of the software.
It is also possible to download the source code directly, without using git, at http://download.qt.io/official_releases/qt/. In the following example I installed Qt 5.13.2 on my Mac. First, I downloaded the qt-opensource-mac-x64-5.13.2.dmg file from the URL above. Then I used the application qt-opensource-mac-x64-5.13.2.app to install the tools and the source code at my home directory in the folder Qt5.13.2. Finally, I performed the following steps (again, you have to accept to license in the configure step):
  > cd ~/Qt5.13.2/5.13.2/Src/
  > ./configure -prefix $PWD/qtbase -opensource -nomake tests
  > make -j 4
The next step is to install PySide2 using pip:
> pip3.7 install PySide2
A couple Python Qt examples
Once all is installed you can create your own first Qt application:
How to use Matplotlib to plot graphs in a Python Qt application
This has been fun, but no plotting of graphs so far. How can we connect Matplotlib with Qt? We start with this code:
# Qt and matplotlib integrationimportmatplotlibmatplotlib.use("Qt5Agg")frommatplotlib.backends.backend_qt5aggimportFigureCanvasfrommatplotlib.figureimportFigure
We use matplotlib.use("Qt5Agg") to select the Qt backend for rendering and GUI integration. FigureCanvas is the area onto which the figure is drawn. Since we are creating a Qt application where we want to plot a graph in the GUI, we have to use the FigurCanvas from Qt. A Matplotlib Figure includes the plot elements. We will in this example add a plot to such a Figure (see add_subplot below).
We will use different Qt widgets in the implementation of this example. QLabel and QLineEdit for text, QPushButton for buttons, and QHBoxLayout and QVBoxLayout to create the layout of the application:
# Use Qt with the PySide2 mapping (Qt's official Python mapping)fromPySide2.QtWidgetsimportQApplication,QWidgetfromPySide2.QtWidgetsimportQHBoxLayout,QVBoxLayoutfromPySide2.QtWidgetsimportQPushButton,QLabel,QLineEdit
We will create a widget, MyPlotWidget, for our plotting application. It includes a canvas for the plot:
classMyPlotWidget(QWidget):labeltext="Write an expression to plot (Python "+ \
"syntax, including numpy mathematical functions ""with one variable): "def__init__(self,app):QWidget.__init__(self)self.fig=Figure(figsize=(10,8),dpi=100,facecolor=(0.8,0.8,0.9),edgecolor=(0,0,0))self.ax=self.fig.add_subplot(1,1,1)self.canvas=FigureCanvas(self.fig)
Then we create all the building blocks for the application, including input text (QLineEdit), buttons (QPushButton) and help text (QLabel):
# Create the building blocksself.setWindowTitle("Plot a graph")self.plotlabel=QLabel(self.labeltext)self.exprlabel=QLabel("Expression (with variable x):")self.expr=QLineEdit("sin(1/x)")self.minlabel=QLabel("Min x:")self.min=QLineEdit("-pi/4")self.min.setFixedWidth(80)self.maxlabel=QLabel("Max x:")self.max=QLineEdit("pi/4")self.max.setFixedWidth(80)self.button1=QPushButton("Plot it")self.button2=QPushButton("Exit")
The overall application layout is specified by at QVBoxLayout, a vertical stack of building blocks (widgets). Inside this box we also have a horizontal line of building blocks created with a QHBoxLayout:
The final thing we do when a MyPlotWidget is initialised is to connect the GUI-actions to the code (button clicks, and carriage return in the edit fields):
# Connect button clicks and CR to actionsself.button1.clicked.connect(self.plotit)self.button2.clicked.connect(app.exit)self.expr.returnPressed.connect(self.plotit)self.min.returnPressed.connect(self.plotit)self.max.returnPressed.connect(self.plotit)
The method plotit calculates 100.001 points on the graph for the given x-values and the expression (function). It then clears the plot and updates it with the calculated values. Finally the updated plot is drawn in the canvas:
That was the complete implementation of the MyPlotWidget class. The last lines of code creates a Qt application with such a visible widget before the execution is handed over to the Qt execution environment:
# Create Qt app and widgetapp=QApplication(sys.argv)widget=MyPlotWidget(app)widget.show()sys.exit(app.exec_())
The complete code for this Qt and Matplotlib example is available here: qt-matplotlib.py.
Until recently, I have been an Aquamacs user on the Mac. However, recently I have been switching back to a more standard Emacs distribution for Mac. After some time of research I ended up with the Emacs Mac Port. This distribution is easily installed and updated through Homebrew, and since I am already using Homebrew for other important software on my Mac (including bsdmake), this was an obvious choice. I use Homebrew to install the Emacs Mac Port from railwaycat with these commands:
  brew tap railwaycat/emacsmacport
  brew install emacs-mac
Later, when I want to update to the latest release, I just do this:
brew update emacs-mac
Optionally, you can also create a soft-link in the Application directory to be able to access Emacs from there:
Tips to run Emacs from command line prompt can be found here.
Since I want to have a more Mac feel to my Emacs on the Mac (used Aquamacs to long, I guess), the final configuration I suggest is to add support for typical Mac key bindings. I use a modified version of this mac-port-keys.el. My remapping of modifiers is changed to the following (use the function modifier key for meta since I need option modifier key for different key modifiers, including typing the Norwegian letters æ, ø and å):
On my iMac keyboard, I do not have the function modifier key on a proper location, so I use Karabiner-Elements to map the unused Caps Lock key to the function modifier (the fn-key). I actually do this on all my Macs, since I never use Caps Locks and the meta key is used a lot in Emacs.
And I use Cua-Mode (but I disable the overriding of standard Emacs bindings):
  ;; Cua-mode (AA)
  (cua-mode t)
  (setq cua-enable-cua-keys nil)          ; C-v and M-v to scroll!
Previously, I have discussed How to open Emacs from a link in an HTML file on Mac OS X. This post is just to give a complete overview of how this can be done without to many manual tasks. My complete AppleScript program and its Makefile is available for download. It should only be used with your own modification. It includes the usage of cvs to commit the changes in the bib files to my local cvs-server and the establishment of a VPN connection if I am not on my local university network (since my cvs-server is not available outside the university network). This part should be completely recoded for your usage.
In the previous post I explained the changes needed to be done in the Info.plist file of the application. The application is compiled using osacompile:
osacompile -o EmacsURL.app EmacsURL.applescript
The Info.plist is now located in the EmacsURL.app/Contents directory. To add the necessary properties in the Info.plist file we perform the following PlistBuddy commands (in the EmacsURL.app/Contents directory):
First we add an identifier for the application (com.apple.AppleScript.EmacsURL). Then we add the URL-handling as an array that contains one dictionary with a name (Emacs Helper) and a scheme. The scheme is an array with a single string element (emacs). The consequence is that this application will handle the emacs URL protocol (handle URLs with the prefix emacs:). To activate this on OS X, the application should be run once after it is installed. For other details regarding compiling, modifying the Info.plist file, and installing the program, see the Makefile file.
I currently use Airmail as my Mac (and iOS) mail client. With many email accounts I found that Airmail fits my needs OK. And I have created a large number of rules that is automatically performed on new emails in my inbox. However, for different reasons I would sometimes like to perform all my rules manually. As far as I know this is not possible in the Mac version of Airmail. So I had to implement it myself using AppleScript. You can find the program below. A few things you should be aware of: (i) This program do not open the Airmail application (I expect Airmail to be in use on your Mac). (ii) The program needs to be able to control your computer (see System Preferences → Security & Privacy → Privacy → Accessibility). (iii) I have tried to make it robust, but no guarantees. It could mess up.
I suggest to save this code as the application RunAllAirmailRules.app in the Applications folder of your home directory (choose File Format → Application in the save dialog in Script Editor). Enjoy.
-- An Airmail 3 applicationtellapplication"System Events"totellprocess"Airmail 3"setfrontmosttotrue-- Activate (and open) "Rules" window of Airmail 3setrulestowindowswheretitlecontains"Rules"ifrulesis{}thenclickmenuitem"Rules"ofmenu"Window"ofmenubar1delay1setrulestowindowswheretitlecontains"Rules"endififrulesis not{}thenperform action"AXRaise"ofitem1ofrules-- Traverese all rulessetall_rulestorowsoftable1ofscrollarea1ofitem1ofrulesrepeatwithruleinall_rules-- Select rule and go to preview of the rulesetthevalueofattribute"AXSelected"ofruletotruesetenabled_ruletothevalueofcheckbox"Enable"ofitem1ofrulesasbooleanifenabled_rulethenclickbutton"Preview"ofitem1ofrules-- Click "Apply to ..." buttonsetbtn_oktofalserepeatwhilenotbtn_oktrysetbtntobutton"Apply to previous messages"ofsheet1ofwindow"Rules"ifenabledofbtnthensetbtn_oktotrueendifonerrormsgdelay0.1setbtn_oktofalseendtryendrepeatclickbtn-- Click "Close" buttonsetbtn_oktofalserepeatwhilenotbtn_oktrysetbtntobutton"Close"ofsheet1ofwindow"Rules"ifenabledofbtnthensetbtn_oktotrueendifonerrormsgdelay0.1setbtn_oktofalseendtryendrepeatclickbtnendifendrepeatendifendtell
Since I do most of my writing in LaTeX, I have all my references (publications I cite when I write papers) in a series of bib-files (for BibTeX). To easier browse and search these references I have created a small Python script that generates a HTML document with all these references. Each reference also includes a link to the bib-file this reference was found in. In the link I include the key of the reference as a fragment identifier. And to specify that I want this link to be open in Emacs, I identify the URL protocol as emacs. The following is an example of such a URL:
emacs:///path/to/file/refs.bib#smith1999a
This link should open Emacs at the start of the reference with the key smith1999a in the file /path/to/file/mybib.bib. The next step is to create an application doing the necessary work and register the URL protocol emacs to activate this application. The easiest approach on a Mac is the write a short AppleScript Application. I have followed the instructions found at these two articles: Launch Scripts from Webpage Links and OS X URL handler to open links to local files. First I created the following AppleScript application:
onopen locationemacsURL-- Find file path and BibTeX key positions in URLsetptotheoffsetof"///"inemacsURLsetitotheoffsetof"#"inemacsURL-- File pathsetfntotext(p+2)thru(i-1)ofemacsURL-- BibTeX keysetbktotext(i+1)thru-1ofemacsURL-- Line number of BibTeX key, e.g. -- grep -n {smith199a, refs.bib | awk -F:'{ print $1 }'setlnto(do shell script"grep -n {"&bk&", "&fn&" | awk -F: '{ print $1 }'")-- Open file in Emacs on correct line using -- "+line:ln <filename>"ifapplication"Emacs"is notrunningthentellapplication"Emacs"toactivatedelay2 -- To ensure Emacs is readydo shell script"/usr/local/bin/emacsclient -n +"&ln&" "&fnelsedo shell script"/usr/local/bin/emacsclient -c -n +"&ln&" "&fnendifendopen location
From the Script Editor I saved the above AppelScript code as an Application. Then I had to edit the property list file of the application. In Finder, click on the application with the Control key held down and choose Show Package Contents. Go to the Contents folder and edit the Info.plist file (using Emacs or other suitable programs like Vim, Coda or Xcode). I changed the CFBundleIdentifier and added the following lines to register this application to handle the emacs URLs:
In 2012 I posted a post on using PyCrypto with Python 3 and some AES and RSA examples. Now, I usually use the cryptography Python library (implemented for both Python 2 and 3). I have ported all my PyCrypto examples from 2012 (see the README file) to the cryptography library.
pycryptex.py / pycryptex-cbc.py
pycryptex.py [src] is a small example using AES to encrypt and decrypt a text:
> python3 pycryptex.py
The example includes two versions, one using the high level Fernet class and the other using the more low level hazmat functions. In pycryptex-cbc.py [src] the second version is implemented using CBC mode (where padding is necessary):
An example with three programs. pycrypto-mkkey.py [src] is used to generatea RSA key-pair. To generate an RSA key pair stored in the file k1 and protected with the password "passwd" is done with the following command (the public key is stored in the k1.pub file):
> python3 pycrypto-mkkey.py k1 "passwd"
pycrypto-encrypt.py [src] generates an AES key and use this key to encrypt plaintext data read from stdin (README in the example below). The ciphertext is written to stdout (CIPHER in the example below). The AES key is encrypted using the public RSA key k1.pub generated above and then saved to file k2 (no password needed since the public key is not password protected):
pycrypto-decrypt.py [src] reads the encrypted AES key k2 end decrypts it using the RSA key k1 (k1 is protected with the password "passwd"). It then use the AES key to decrypt the ciphertext data read from stdin (CIPHER in the example below). The plaintext is written to stdout:
An example with two programs, a server pwsec-server.py [src] and a client pwsec-client.py [src]. The example demonstrates secure communication using AES. The shared key is generated from a password (the shared secret). We are using CTR mode, and the initial value (for the counter) is sent first in the first message. First start the server then the client:
These two programs are using the tcp module from NOOP project (currently, only a few of the modules from the NOOP project are released, May 2015).
pubsec-send.py / pubsec-receive.py
An example with two programs, a sender pubsec-send.py [src] and a receiver pubsec-receive.py [src]. The example demonstrates secure communication using a combination of RSA and AES. The sender use the public RSA key of the receiver to encrypt the first message sent to the receiver. This message contains the shared secret AES key of the session. Then the sender sends a message encrypted with this key. First start the receiver then the sender:
In the last post we demonstrated how to automate a task using AppleScript and the Fake scriptable web browser. Often, I use automator included on every Mac to perform such task. To activate them, we bind them to a keyboard shortcut in the given application. The example we will use today is to press the a keyboard shortcut to load the remote content of an email in Mail.app (you have of course turned off loading all remote content in emails by unselecting Load remote content in messages in the Viewing part of Mail.app Preferences).
Create the automator workflow
We start by creating the automator workflow:
Start Automator and select New Document.
Choose the type of workflow to be Services.
Choose that service receives no input in Mail.app.
Open Mail.app and open an email with (unloaded) remote content.
In Automator, press the Record button.
In Mail.app, press the Load Remote Content button.
In Automator, terminate recording.
Save the service workflow with the name Load Remote Content.
You should now be able to run this from the Automator to test it (try it by selecting a message with remote content, where the remote content is not loaded). Before you test it be sure that you have given Automator (and Mail.app) access to control your computer. You do that in System Preferences (Security & Privacy → Privacy → Accessibility).
The keyboard shortcut
You should check that the Service you have created is visible in the Mail → Services menu (the Load Remote Content menu is there). If it is there, let us create the keyboard shortcut for it. Open System Preferences and select Keyboard → Shortcut. In App Shortcut add a new with the plus (+) button. Choose Mail.app for the Application, and in the menu title type exactly as it was written above: Load Remote Content. Choose your Keyboard Shortcut (I used Shift-Control-Cmd-I) and press Add.
Now, whenever you read as message with (unloaded) remote content, pressing the keyboard shortcut will load the content in the message.
You can make life a lot easier on your Mac if you learn how to automate things. The standard approach to do this on Macs are to use Automator (see How to use Automator: What Automator is and how it works from Macworld UK). If you include AppleScript, Fake, and the keychain in your toolchain, you can achieve even more.
As an example I will develop an automated task to create a new email alias using a web portal. This example is used since it includes user input (email alias), access of password in keychain, filling in and submitting forms on web pages, and return data to the user though the clipboard. An example using Automator is also available.
AppleScript
The main parts of this example are an AppleScript script and a Fake workflow. We also expect that the password of the user is stored in the keychain [1]. The first thing we do is to fetch the password for the web portal from the keychain:
  set domain_name to "mydomain.com"
  set user_name to "myusername"
  set pwd_cmd to "security find-generic-password"
  set pwd_script to pwd_cmd & " -a " & user_name & " -w"
  set pass_wd to do shell script pwd_script
The next step is to prompt the user for the email alias (including converting the input to lower case [2]):
  set dialog_txt to "New email alias (<alias>@" & domain_name & "):"
  display dialog dialog_txt default answer ""
  set email_alias_case to text returned of result
  set email_alias to _string's lowerString(email_alias_case)
The typical use for the user of a new email alias is to type the new email address in to a web form. To make this easier for the user we'll copy the new email address to the clipboard:
set the clipboard to email_alias & "@" & domain_name
The final part of the AppleScript is to execute the Fake workflow. We have to transfer three parameters (variables) to the workflow:
  tell application "Fake"
    set variable with name "emailAlias" to email_alias
    set variable with name "userName" to user_name
    set variable with name "passWd" to pass_wd
    activate
    open "Users:aa:Applications:MakeEmailAlias.fakeworkflow"
    delay 1
    run workflow with variables { \
      emailAlias:email_alias, \
      userName:user_name, \
      passWd:pass_wd \
    }
    wait until done
    close front document
    quit
  end tell
The only thing missing in the AppleScript code above is loading of the text string manipulation library _string.scpt[2]:
  set _string to load script alias ( \
    (path to library folder from user domain as text) & \
    "Scripts:Libraries:" & "_string.scpt")
Fake workflow
The Fake workflow receives 3 parameters (variables) from the AppleScript; the new email alias (emailAlias), the username (userName), and the password (passWd) to log in to the portal. In the Fake workflow we use these variables to fill in the correct values at web form. The following Fake workflow is an example, and it as to be updated based on the actual web portal you are using. The example workflow consists of 4 steps (and 10 Fake workflow actions):
Go to login web page:
Load URL: example.com
Log in with username and password (and wait a second):
Set Value of HTML Element:
with id: user
to: {userName}
Set Value of HTML Element:
with id: password
to: {passWd}
Click HTML Element:
for XPath: /html/body/div/...
Delay:
for: 1.0 seconds
Select web page where email aliases can be added:
Click HTML Link:
with text: email@mydomain.com
Add email alias (and wait tw seconds):
Focus HTML Element:
with id: newalias
Set Value of HTML Element:
with id: newalias
to: {emailAlias}
Click HTML Element:
with id: submit
Delay:
for: 2.0 seconds
In the example above we use different approaches to identify the elements on web pages (with id, for XPath, with text). In your case you should use the approach that is easiest for the web pages you are scripting. Fake provide a feature where you can drag the id of an element to the workflow action id value.
Notes
To store and access data in the keychain we use the security command line interface. To add a new account name with password pwd to the keychain you can do the following command:
security add-generic-password -a name -s service -w pwd
Then we can print this password with the following command:
security find-generic-password -a name -w
(In the first command service is a human readable name describing your service.)
I've written many papers and a lot of web pages that includes source code. Since Python code was an important part of my Dr. thesis, I even wrote a tool to generate a pretty-printed Python code for LaTeX (this was written in 1997, but since I've been using it ever since it has had a few minor bug fixes since then; however, it needs Python 1.6 and it was the first Python program I ever wrote!). Just by accident (being sidetracked when I was checking outMiddlemanextensions) I rediscovered Pygments yesterday. I know I've seen it before, but I had forgotten all about it. This time I checked it out, and I think it will finally replace my home-written tool. Since I write most of my papers in LaTeX and I use BSDmake to do the magic, I have included a few new rules in my Makefile (using my old ltk.mk file):
In the LaTeX document I have to include the generated style file and the fancyvrb package (and for most styles the color package). If the source code included in the document is in the file src/mypycode.py, then you will find this in the LaTeX document (ltx.mk expects to find source code files in the src directory):
Pygments can be used to generate TeX, LaTeX, HTML and many other formats. It supports a wide range of programming languages, and can easily be extended to other formats and other programming languages. It is highly configurable and flexible, and the command line way of using it is the simple approach. For full control and flexibility you write your own tool using Pygments as a Python library (and it supports both Python 2 and 3).
The styles, programming languages, formats, and filters available can easily be listed with these commands:
The language announced at WWDC yesterday came as a big surprise to almost everyone. At Chris Lattner's Homepage you can find a short summary on the history of the Swift programming language. He started work on the language in July 2010, and it became a major focus for the Apple Developer Tools group 3 years later. Other people started to contribute to the project in late 2011. He mentions Objective-C, Rust, Haskell, Ruby, Python, C#, CLU as inspirations for the language itself, and Bret Victor's ideas and Light Table as inspiration for Xcode Playgrounds (Playgrounds allow you to edit the code listings and see the result immediately). He says that Playgrounds and REPL (Read-Eval-Print-Loop) were a personal passion of him. REPL is an interactive version of Swift built into the debugging console of Xcode. You can use Swift syntax to directly evaluate and interact with your running app in the Xcode console.
I've just developed my first application in Swift, the new language announced by Apple yesterday. I downloaded the Swift book on my iPad during the Keynote, and started programming immediately. When I got hold of Xcode beta 6 I got it running in seconds.
My first impression: Swift is a modern language. It is closely related to popular scripting languages, like Python and Ruby, but is is a compiled language. It is also a type safe language, but when the type is obvious, the programmer doesn't have to bother with it (the compiler infer its type). The Swift syntax is easy to read and not strange and new. Important features that often make the syntax of a language complex and unreadable is actually quite clear in Swift (including generics, protocols and extensions). This is a class Amplifier implementing a protocol VolumeControl:
protocol VolumeControl {
    var level: Int { get }
    mutating func increase() -> Int
    mutating func decrease() -> Int
    mutating func mute()
}

class Amplifier: VolumeControl {

    var level: Int {
    didSet {
        if level < 0 { level = 0 }
    }
    }
    var step: Int
    var source: String

    init(level: Int = 0, step: Int = 1, source: String = "dvd") {
        self.level = level
        self.step = step
        self.source = source
    }

    func increase() -> Int {
        self.level += step
        return self.level
    }

    func decrease() -> Int {
        self.level -= step
        return self.level
    }

    func mute() {
        self.level = 0
    }

    func selectSource(source: String) {
        self.source = source
    }

}
The protocol specifies one attribute with a getter and three methods. The class implements this protocol by providing access to the attribute and implementations of the methods. The didSet on the property is used to ensure that its value is never negative. The default values in the init method arguments means that these arguments are optional. We can create instances of Amplifier like this:
var a1 = Amplifier()
var a2 = Amplifier(level: 3)
var a3 = Amplifier(level: 1, step: 2)
var a4 = Amplifier(level: 10, step: 5, source: "phono")
But more interestingly, we can access the implementation through a protocol (and only have access to what the protocol provides, not everything from the class instance):
var v: VolumeControl = a1
var level = v.increase()
if level > 100 {
    v.mute()
    level = v.level
}
A good place to start is A Swift Tour. More on Swift later.
I needed a few Perl modules that weren't installed on the standard Perl installation on my Mac (OS X 10.9.2). In How to install Perl modules on Mac OS X in 4 easy steps I found all the details needed. I didn't need to do step 1 (and 1.5) since this is the first thing I do on every new Mac instance. To summarize what I did in 3 steps to install the two modules I needed:
My main programming platform is OS X 10.8 and Python 3 (currently Python 3.3). In earlier blog posts I have discussed installing and usingPyCrypto in this environment. My next attempt was to find a GUI solutions for this platform. I usually prefer native approaches when programming, and for OS X the Cocoa framework is the native approach. To get access to this from Python we need a bridge, and the bridge is called PyObjC. At the home page PyObjC seems like a dead project. But Ronald Oussoren is still doing some development, including Python 3 support. It is not straight forward to compile and install PyObjC for Python 3, but Giacomo Lacava provides the necessary steps. To summarize I have done the installation using the following steps:
Earlier today I wrote about installing PyCrypto for Python 3 on OS X 10.8. I will use the opportunity to provide a few examples using PyCrypto to do AES and RSA encryption and decryption. I have created 3 programs. The first one, pycrypto-mkkey.py [src], generates an RSA key and saves it in two different files. One including the private key and one with only the public key (using the .pub extension). The stored private key is password protected with the given password. The program is used like this:
python3 pycrypto-mkkey.py rsa-key "passwd"
The second program, pycrypto-encrypt.py [src], use the public RSA key to encrypt a file. Actually, the file is encrypted using AES, and the AES key is then encrypted with RSA. First the program generates a new fresh AES key and saves it to disk encrypted with the RSA key. Then it uses this AES key to encrypt the file (from stdin) and write the encrypted data to stdout. The program is used like this:
The third program, pycrypto-decrypt.py [src], use the private RSA key to decrypt the file. Actually, the file is decrypted using AES, and the AES key is decrypted using RSA. First the program decrypts the AES key with the private RSA key. Then it uses this AES key to decrypt the file (from stdin) and write the decrypted data to stdout. The program is used like this:
On an updated Mac (in my case 10.8.2) with an updated version of Xcode (in my case 4.5.2) compiling and installing PyCrypto for Python 3 (in my case 3.3) is not just simply running the setup.py script. The latest release of PyCrypto is 2.6 and it supports Python 3 (it has supported Python 3 since version 2.4). But my earlier attempts using Python 3.2 on OS X 10.8 failed since it couldn't locate the SDKs and the SDK for OS X 10.6 was not installed (see issue14498 and relatedposts to solve these issues). In Python 3.3 this is not an issue any more, but using the correct version of the compiler is. To get the build process to use the correct compiler I tried with the following build command (llvm-gcc-4.2 is the compiler we want to use on current OS X):
> CC=llvm-gcc-4.2 python3.3 setup.py build
In the beginning of the build process it seemed to use llvm-gcc-4.2, but finally it failed with this message:
unable to execute gcc-4.2: No such file or directory
The obvious solution is the create a symlink from llvm-gcc-4.2 to gcc-4.2:
And we are done. A small example using PyCrypto to encrypt a text with AES:
> python3.3
Python 3.3.0 (v3.3.0:bd8afb90ebf2, Sep 29 2012, 01:25:11)
GCC 4.2.1 (Apple Inc. build 5666) (dot 3)] on darwin
Type "help", "copyright", "credits" or "license" for more information.
>>> from hashlib import sha256
>>> from Crypto import Random
>>> from Crypto.Cipher import AES
>>> from Crypto.Util import Counter
>>> pwd = "My secret password"
>>> key = sha256(pwd.encode()).digest()
>>> irv = Random.new().read(AES.block_size)
>>> icv = int.from_bytes(irv, "little")
>>> ctr = Counter.new(AES.block_size*8, initial_value=icv)
>>> cip = AES.new(key, AES.MODE_CTR, counter=ctr)
>>> msg = cip.encrypt('Attack at dawn'.encode())
To decrypt the message msg you need the password pwd or the key (the secret) and the initial counter value icv (can be public). The Python code to do this is left as an programming exercise for the reader (or you kan peek at pycryptex.py [src]).
I consider myself a programmer, and to perform this task I rely on a set of tools. I need a text editor, compilers and/or run-times, build-systems, code repositories, documentation, and sometimes even an IDE. Since the late 80s my text editor of choice has been Emacs (and Aquamacs on OS X), but I am also comfortable with vi (including Vim) and ed. Currently, I am investigating time in newer text editors, like Sublime Text (writing editor plugins in Python should be fun) and Chocolat, but we are not close friends yet (but I will spend more time with subl to see how our relationship evolves). More on these tools later.
When programming, the code is viewed in a text editor (or IDE) in a font (the size and style of a particular typeface). The default fonts for most code editors are OK, but we can do better than OK. On OS X I have tried and used a lot of different fonts for coding. Since yesterday my preferred font for coding Python was Menlo Regular 13 (also used by Xcode):
I believe Apple's Menlo has evolved from DejaVu Sans Serif Mono (common on Linux) and Bitstream Vera Sans Mono. Previously, I used Monaco Regular 12, but I switched to Menlo since I find it less noisy. Yesterday I came over this announcement of the open source font Source Code Pro from Adobe (via Daring Fireball):
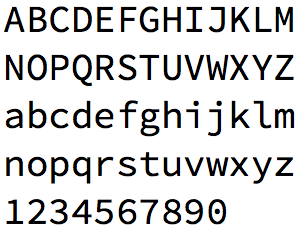
Now I have used Source Code Pro Regular 13 for one day programming in Python, and it is too early to conclude that the font is a good coding font option for me. My first impression is good. The font has a lightness to it that I like, and it is readable and clean. I will use it for a few more hours and then conclude if it should replace Menlo Regular 13 as my preferred coding font. I might even end up using different fonts depending on programming language and text editor. However, I recommend that you download and try this new open source font from Adobe.
Input is a flexible system of fonts designed specifically for code by David Jonathan Ross. It offers both monospaced and proportional fonts, all with a large range of widths, weights, and styles for richer code formatting.